Description
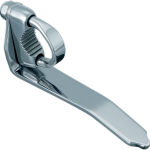
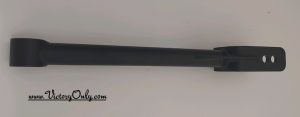
LOWERING KIT REAR LINK Cross Country & Vision
LOWERING KITS REAR 1 INCH or 2 Depending on which mounting point you use. 1 Kit does it all!
FOR Victory Motorcycle Cross Country, Victory Cross Roads, Victory Hardball or Victory Vision
-
Reduce the center of gravity, give you a better handling
- All lowering kits are Super Strong
- Only our lowering kits have Sealed Pressed Heavy Duty Bearings. (Can Be Replaced If ever damaged)
- All lowering kits are Mig Welded
- All lowering kits are Ceramic Coated or Powder Coated
- All lowering kits are USA Made
- Uses OEM hardware for mounting
- Choose the correct hole in the link to choose 1 or 2 inch. Does not break like the screw in adjustable links do. Our design does not have the weak point that breaks as our solid design does not screw in creating the weak point on the threads screw adjustable links are known for. We have ours Tig Welded to rest assured ours will last!
- fits all years and models of Victory Cross Country, Cross Roads, Vision
LOWERING KIT REAR 1 INCH or 2 inch LINK KIT
The 1 – 2 inch link is our newest design with heavier duty bearing for longest life. Stronger Build and Ceramic coated for strongest color protection.
TAKES ABOUT 10 MINUTES TO CHANGE THE HEIGHT DIFFERENCE.
Lower your Victory Motorcycle Cross Country, Victory Cross Roads, Victory Hardball or Victory Vision with our lowering link kits.
The brackets are laser cut and mig welded on our state of the art jig for the ultimate in strength and reliability.
Uses your factory hardware.
Powder coated black for long lasting good looks. Medium difficulty to install.
TIP* pack some grease around the bearing before installing the spacers to seal out dust and water.
Lower your Victory Motorcycle Cross Country, Victory Cross Roads, Victory Hardball or Victory Vision with our lowering link kits.
The brackets are laser cut and mig welded on our state of the art jig for the ultimate in strength and reliability.
Uses your factory hardware. Powder coated black for long lasting good looks.
Medium difficulty to install.
TIP * pack some grease around the bearing before installing the spacers to seal out dust and water.
LOWERING KIT REAR 1 or 2 & 3 INCH LINK KIT
NOTE: Lack of improper air pressure in the shock, could result in damage to the link. We recommend that you keep 30-35 psi. (for one rider), and 60-65 (for two riders).
Vision Riders 1 Inch is recommended in most cases due to Custom modifications to the inner of the saddle bags are needed in order to install this part if your lowering it more than 1 inch. ( Only on the Vision).
Vision if you lower it 1 1/2 or lower you will need to replace the saddle bag inner liner with the Arlen Ness saddle bag insert. If not the belt drive will bust the saddle bag.
| WEIGHT | 2 lbs |
|---|---|
| DIMENSIONS | 16 × 5 × 5 in |
| MODEL | XC/XR, Vision |
CUSTOMERS SAY-
“Got the bike lowered. Didn’t take long at all. Actually the hard part was getting the shorter kickstand on.
That spring is tougher than I thought but it did finally just drop into place like magic.
Took a short cold ride afterwards. The bike handles just like it did before lowering.
I can back the thing up now and can stand flatfooted.
I feel much more secure when stopping. I’m 5’6″ and 1” lower is perfect for me.
Made in the USA
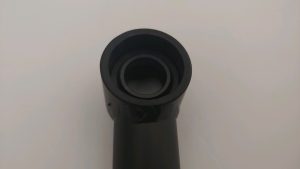


To install Victory Cross Country or Vision Lowering Kit.
Note: We recommend a certified mechanic install this link for safety purposes
1. Safely support motorcycle using lift or jack. For safety reasons, strap the bike down. Remove the right and left saddle bag. Remove both side covers and seat. Make sure to release all the air from the shock.
2. Jack bike up until the link becomes loose, and will wiggle back and forth. This is the âsweet spotâ. Remove lower bolt on link. Jack bike up a little to find the sweet spot on the shock. Remove lower bolt.
3. Remove the side fuse panel on the right side of the bike. This will give you better access to the shock and link mechanism. Tie the panel up, on top of the bike, to keep it out of the way. Leave all wires connected.
4. Remove the splash shield at this time. It is not bolted in, just pull on the wing tabs, located in front of the rear tire. The shield should pop right out. It secures in with a slot tab, located on top of the bike. You will need to insert the tab in first, when replacing the shield, then push in on both sides of bottom wing tabs and the shield will pop into place, when reinstalling it. Remove plastic push pins holding on air line in splash shield. Place shield off to side. This will give you more room to work on the link.
5. Next, remove lock bolt for pivot pin. It is located under the seat, on the top of the upper back bone. It will take an allen head 6mm allen wrench to remove. Once you have removed the pin, look in front of the back wheel from under the bike. You will see the pivot pin, where it installs into the frame. Simply pull out the pivot pin. This will allow the complete shock mechanism to drop, allowing access to the upper link bolt. Make sure you support the shock from dropping.
6. Remove the upper link bolt. Install new link and mount spacers and washer inside the ears of link. Tighten snug. Do not over tighten. Lift shock mechanism and install pivot pin. Next, secure lock screw for pivot pin. Reinstall lower shock bolt. Reinstall link bolt. You may need to jack up a little on the jack to line up the shock and link for re installation. Double check to make sure all bolts are secure.
7. Reinstall fuse panel and splash shield, then reinstall seat, side covers, and bags.
8. Install air back in shock.
 Victory Only Motorcycle carries the largest stock of performance mods, upgrades, custom equipment gear & apparel, OEM replacement and aftermarket parts & accessories for Victory Motorcycles with international worldwide shipping to Canada, Uk, CZ, GB, Australia and anywhere a Vicory Motorcycle rider wants to do it yourself customizing of a show quality bike.
LOWERING KIT REAR LINK Cross Country & Vision 3 Lengths Available


