Description
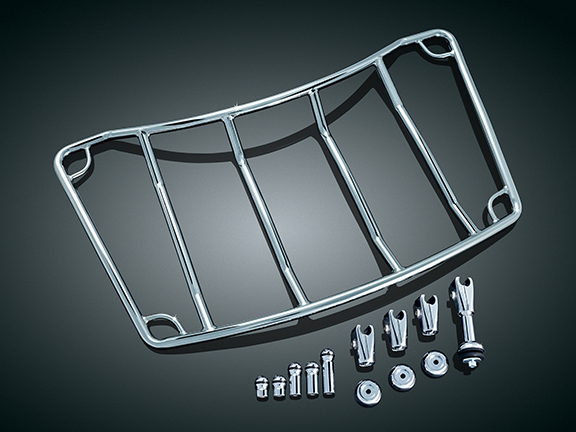
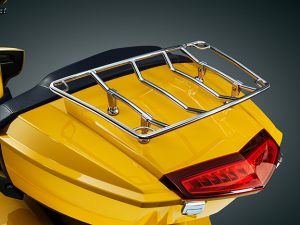
7159 Touring Trunk Lid rack
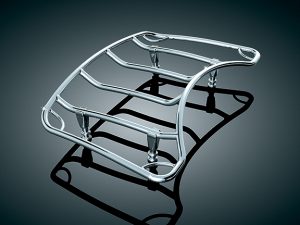
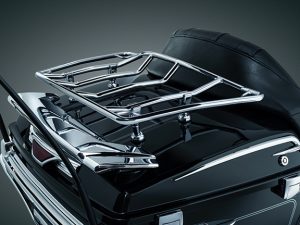
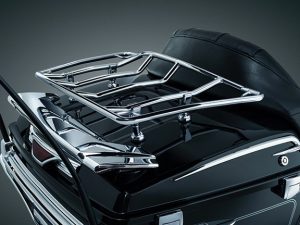
Victory Motorcycle Touring Trunk Lid rack completely adjustable.
Designed to fit virtually any tour trunk thanks to the ingenious adjustable mounting stand offs, this luggage rack can conform to any trunk lid whether flat or curved. Features include a chrome 1/2″ tubular design that allows the use of any common flag holder if desired, as well as handy built in corner loops to keep your luggage secure. Also included in the kit, a pair of mounting extensions for trunk lids with a steep downward rear swoop or with a trunk lid spoiler installed.
included to accommodate different shaped trunk
lids.
at the marks on the rack. Loosen the socket head cap screw in the
clamp assemblies until they are able to be slipped over the rack bars.
Snug the fasteners to allow adjustment of the clamps on the rack
bars.
will simultaneously secure the clamp to the bar
and the mounting leg. Ensure that the mounting
legs remain in the clamps when attaching to the rack
bars.
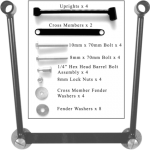
PARTS INCLUDED
1 Multi-Rack—Chrome
1 Mounting Leg Kit Containing:
2 Short Mounting Legs
2 Medium Mounting Legs
2 Tall Mounting Legs
1 Clamp Kit Containing:
4 Clamp Assemblies
1 Foot Kit Containing:
4 Round Rack Foot Bases
1 Hardware Kit Containing:
4 #10-24 X 1-1/8” Socket Head Cap Screws
8 Rubber Washers
4 Wide Flat Washers
2 #10-24 X 7/8” Socket Head Cap Screws
1 Installation Instructions
Please read and understand entire instructions before starting installation.
THANK YOU FOR CHOOSING KϋRYAKYN!
IN ORDER TO PROTECT YOU AND OTHERS FROM POSSIBLE INJURY AND/OR
PROPERTY DAMAGE OR LOSS, PLEASE PAY CLOSE ATTENTION TO ALL
INSTRUCTIONS, WARNINGS, CAUTIONS AND NOTICES REGARDING THE USE
AND CARE OF THIS PRODUCT.
TOOLS SUGGESTED
Set of Hex Wrenches, Drill and Drill Bit Set, Center Punch, Masking Tape, Non-Permanent Marker
STRICTLY OBSERVE THE FOLLOWING GUIDELINES IN ORDER TO USE THE
PRODUCT PROPERLY AND AVOID POTENTIALLY DANGEROUS ACCIDENTS.
This product was designed to fit many different models of
trunk lid. It is up to the installer to determine the best installation.
The following are GUIDELINES to assist in the
installation of the Multi-Rack.
STEP 1 Read and understand all steps in the instructions before starting
the installation. Park the motorcycle on a hard, level surface and
turn off the ignition.
Küryakyn warrants that any Küryakyn products
sold hereunder, shall be free of defects in
materials and workmanship for a period of one
(1) year from the date of purchase by the
consumer excepting the following provisions:
● Küryakyn shall have no obligation in the event
the customer is unable to provide a receipt
showing the date the customer purchased the
product(s).
●The product must be properly installed,
maintained and operated under
normal conditions.
●Küryakyn makes no warranty, expressed or
implied, with respect to any gold plated
products.
●Küryakyn shall not be liable for any
consequential and incidental damages, including
labor and paint, resulting from failure of a
Küryakyn product, failure to deliver, delay in
delivery, delivery in nonconforming condition, or
for any breech of contract or duty between
Küryakyn and a customer.
●Küryakyn products are often intended for use in
specific applications. Küryakyn makes no
warranty if a Küryakyn product is used in
applications other than intended.
●Küryakyn electrical products are warranted for
one (1) year from the date of purchase by the
consumer. L.E.D.’S contained in components of
Küryakyn products will be warranted for defects
in materials and workmanship for 3 years from
the date of purchase where as all other
components shall be warranted for one(1) year.
This includes, but is not limited to; control
modules, wiring, chrome & other components.
●Küryakyn makes no warranty of any kind in
regard to other manufacturer¹s products
distributed by Küryakyn. Küryakyn will pass on
all warranties made by the manufacturer and
where possible, will expedite the claim on behalf
of the customer, but ultimately, responsibility for
disposition of the warranty claim lies
with the manufacturer.
MULTI-RACK 7159
7159-21MC-0713
-cont.-
THIS INDICATION ALERTS YOU TO THE FACT THAT
IGNORING THE CONTENTS DESCRIBED HEREIN CAN
RESULT IN POTENTIAL DEATH OR SERIOUS INJURY.
This indication alerts you to the fact that ignoring the
contents described herein may negatively affect product
performance and functionality or damage the product itself
or the product to which it is being attached.
If installing this product for another party, please make
sure they receive this copy of the installation instructions
so they are aware of the important information contained
in them.
STEP 2 Determine the best mounting location of the Multi-Rack by holding it above the trunk lid. PIC 1
Each mounting foot requires at least a 1 1/8 inch
diameter FLAT area to mount.
DO NOT mount all four feet on the center two
bars.
It is highly recommended that the clamp/stand
assemblies be positioned as far apart front to
back as possible.
DO NOT attach the clamp assemblies on a bend in
the rack bars.
STEP 3 Mark the locations for the clamp on the rack with masking tape
or non-permanent marker. Mark the locations of the feet on the
lid with masking tape. PIC 2
STEP 4 Determine the best combination of mounting legs.
Short, Medium and Tall mounting legs have been
included to accommodate different shaped trunk
lids. PIC 3
It is recommended to mount the rack as horizontally
as possible. Select the combination of mounting
legs that will allow for the most horizontal
position.
STEP 5 To allow for adjustment, loosely assemble the clamp/stand assemblies
at the marks on the rack. Loosen the socket head cap screw in the
clamp assemblies until they are able to be slipped over the rack bars.
Snug the fasteners to allow adjustment of the clamps on the rack
bars.
Tightening the socket head cap screw in the clamp assembly
will simultaneously secure the clamp to the bar
and the mounting leg. PIC 4 Ensure that the mounting
legs remain in the clamps when attaching to the rack
bars.
Ensure that the o-rings remain installed on the mounting
leg ball end. PIC 4
STEP 6 Gently rest the rack on top of the tape marks on the lid to confirm the
fitment of the mounting locations. PIC 5 Make any necessary adjustments
to the clamp/stand assemblies. Slightly loosen the clamps to avoid scratching
the rack bars. See NOTICE on the next page.
MULTI-RACK INSTALLATION
O-RING
SOCKET HEAD CAP SCREW
MOUNT LEG
-cont.-
PAGE
3
The mounting legs should be secured perpendicularly to the trunk lid
surface. PIC 6
STEP 7 Ensure that the rack is in the correct position, the legs are adjusted to contact the lid
perpendicularly and the spacing between the clamp assemblies is sufficient. With a
non-permanent marker, trace around the mounting legs on the masking tape.
STEP 8 Using a center punch, mark the center of the mounting locations determined in STEP 7.
MEASURE TWICE – DRILL ONCE. Double check all reference marks
on the Trunk Lid BEFORE drilling. Küryakyn will not be responsible
for incidental or consequential damages resulting from this installation.
Ensure that there is sufficient clearance and that there are no obstructions
on the underside of the trunk lid BEFORE drilling ANY
holes.
STEP 9 Using a 1/4 inch drill bit, carefully drill through the trunk lid at all four leg locations.
STEP 10 Loosely attach the Multi-Rack to the trunk
lid. Insert the #10-24 x 1 1/8” Socket
Head Cap Screws through the wide flat
washers and rubber washers, through the
trunk lid, 2nd rubber washers, Round Rack
Foot Bases and into the mounting legs.
PIC 7
The two 10-24 x 7/8” Socket Head Cap Screws have been included for use
with the Short Mounting Legs.
In some instances the mounting legs may spin while tightening the 10-24
fasteners. If this occurs, loosen the 10-24 socket heat cap screws in the
CLAMPS until you can remove the rack and the clamps. Insert a flat blade
screwdriver in the slot in the top of the mounting leg to prevent the leg from
spinning while the screw is tightened. Replace clamps and rack and tighten
all hardware.
STEP 11 If you are satisfied with the location and position of the Multi-Rack, tighten all hardware securely.
THE LUGGAGE RACK HAS A 5 POUND LOAD CAPACITY. IT IS UP TO
THE RIDER TO USE THE RACK IN A SAFE AND PROPER MANNER.
OVERLOADING OR USING THE RACK IMPROPERLY MAY RESULT IN
LOSS OF CONTROL, WHICH MAY RESULT IN SEVERE DAMAGE TO
THE MOTORCYCLE AND/OR SERIOUS INJURY OR DEATH TO THE
RIDER AND/OR THEIR PASSENGER. KÜRYAKYN IS NOT RESPONSIBLE
FOR ANY DAMAGE,LOSS, OR INJURY CAUSED BY EXCEEDING
THE LOAD CAPACITY.
NEVER EXCEED THE MANUFACTURER’S RECOMMENDED GROSS VEHICLE
WEIGHT. EXCESS LOADING ON THE MOTORCYCLE COULD
CAUSE DAMAGE, LOSS OR INJURY. KÜRYAKYN IS NOT RESPONSIBLE
FOR ANY DAMAGE, LOSS, OR INJURY CAUSED BY EXCEEDING
THE GROSS VEHICLE WEIGHT LIMITS.
It is the installer’s responsibility to ensure that all of the fasteners
(including pre-assembled) are tightened before operation of the motorcycle.
Küryakyn will not provide warranty coverage on products or components
lost due to improper installation or lack of maintenance. Periodic inspection
and maintenance are required on all fasteners.
Ride On!
MULTI-RACK INSTALLATION
PIC 6
MOUNTING LEG
PERPENDICULAR
TO LID
PIC 7 TRUNK LID
Victory Only Motorcycle carries the largest stock of performance mods, upgrades, custom equipment gear, apparel, OEM replacement and aftermarket parts and accessories for Victory Motorcycles with international worldwide shipping to Canada, UK, CZ, GB, Australia and anywhere a Vicory Motorcycle rider wants to do it yourself customizing of a show quality bike. If you are looking for Chrome or Black Contrast Cut billet aluminum accessories.
7159 Touring Trunk Lid rack

